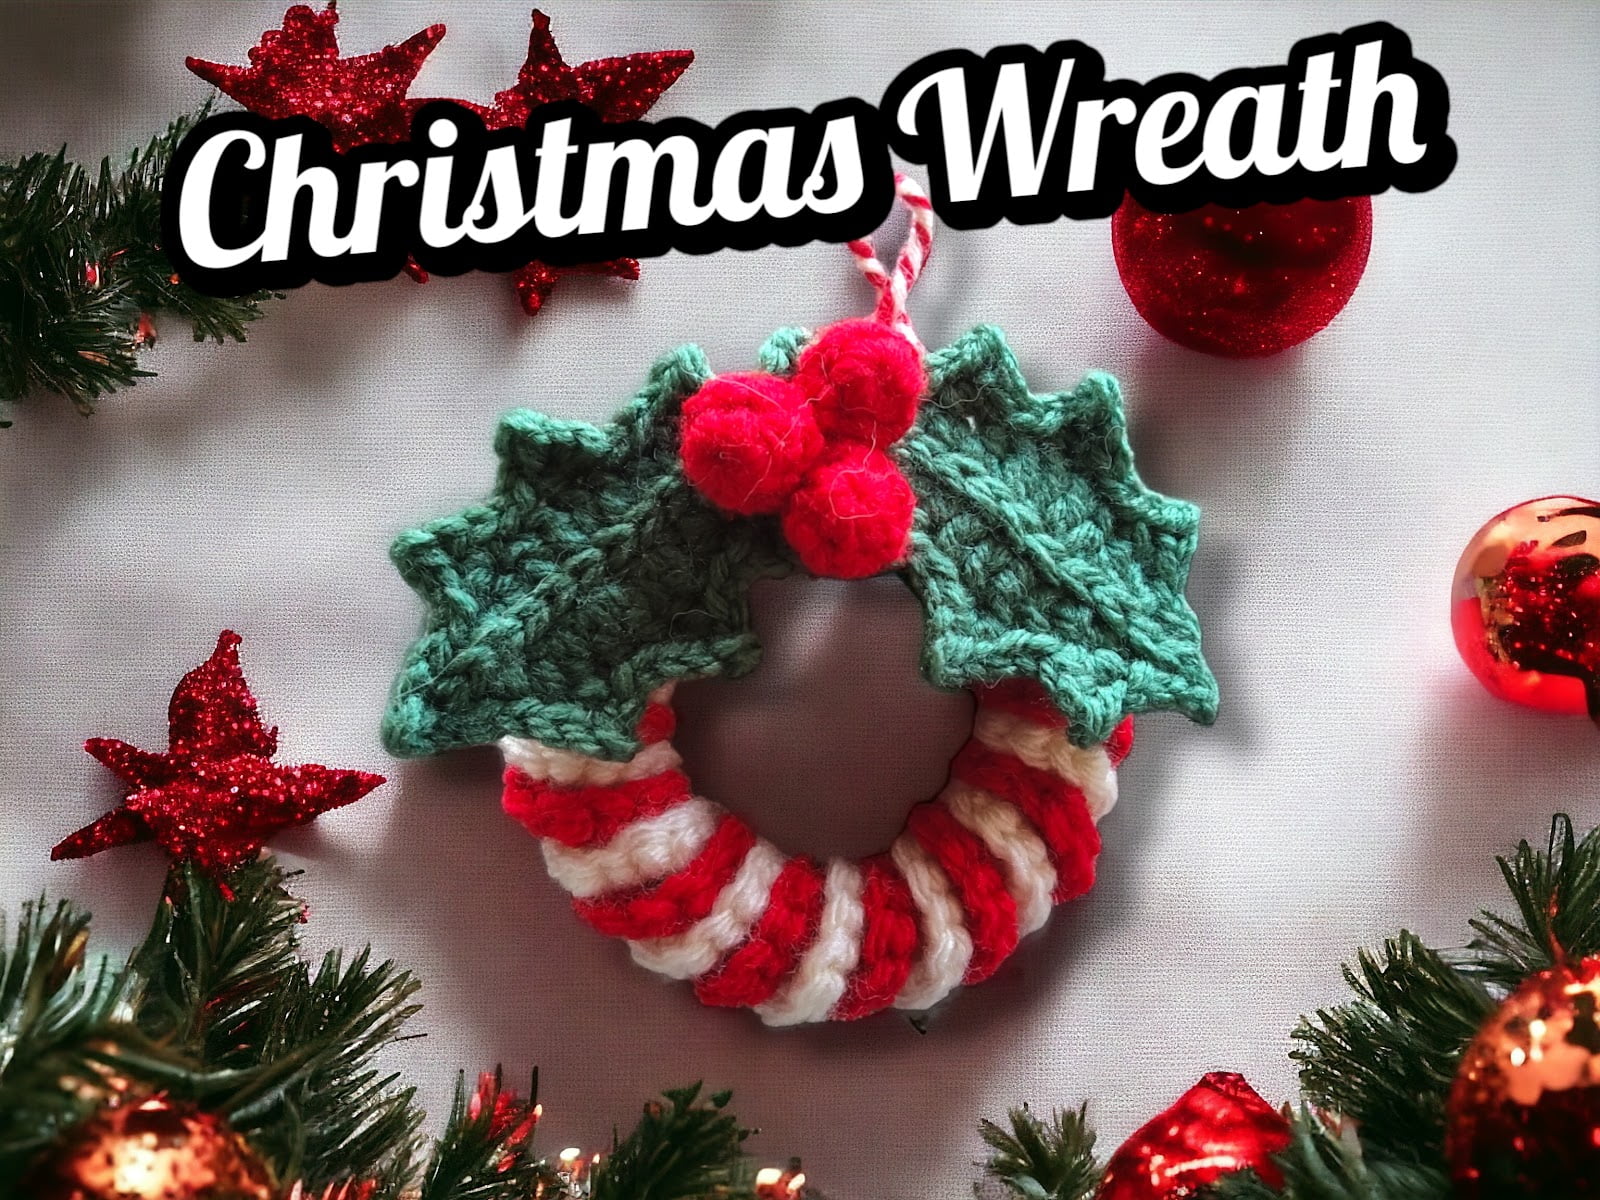
This adorable crocheted Christmas Wreath Ornament is not only super cute but also incredibly easy to make. Its charm lies in its simplicity, making it the perfect addition to your Christmas tree this year. The wreath itself is made up of beautiful white and red spirals, creating a festive and joyful atmosphere in any room.
Get the Ad Free Printable Version Here

Get the Ad Free Printable Version Here
Keep reading for the Free Version
To add an extra touch of elegance, a cute crocheted holly is delicately attached to the wreath, adding a pop of vibrant green and a sprinkle of Christmas magic. You can even get creative and customize the colors of the wreath to suit your personal style or match the overall theme of your Christmas decorations.
Beyond its decorative value, these crocheted Christmas wreath ornaments make for wonderful homemade gifts that convey a sense of thoughtfulness and love. Imagine the joy on your loved ones’ faces as they unwrap these unique and handcrafted ornaments, knowing that you put your heart and soul into creating something special just for them.
So, why not spread the holiday spirit and create these little Christmas wreath ornaments for everyone to enjoy? Not only will you have a fun and relaxing crafting experience, but you will also make lasting memories as you share the joy of Christmas with those dear to your heart.
Gauge
Using single crochet
16 stitches by 18 rows = 4 inch square.
Supplies needed:
Medium worsted yarn
Mainstay Cozy Yarn White – 14 yards
Mainstay Cozy Yarn Spruce – 13.5 yards
Mainstay Cozy Yarn Poppy – 16 yards
Crochet hook – I used 3.5mm but you can use what you would like. Size will change
Yarn needle
Scissors
Stuffing
Stitch marker
Crochet Techniques to Know
Here are the basic crochet stitches we’ll use in this project.
Slip Stitch (sl st): To make a slip stitch, insert the hook into the stitch, yarn over, and pull through both the stitch and the loop on the hook.
Single Crochet (sc): To make a single crochet, insert the hook into the stitch, yarn over, and pull up a loop (2 loops on the hook). Yarn over again and pull through both loops to complete the stitch.
Half Double Crochet (hdc): This stitch is taller than a single crochet. To make an hdc, yarn over, insert the hook into the stitch, yarn over, and pull up a loop (3 loops on hook). Yarn over again and pull through all 3 loops to complete the stitch.
Working in the Back Loops (blo): Normally, we work through both top loops of a stitch. But in this project, we’ll work in the back loops only to create a ribbed texture. To do this, insert the hook under the back loop only. Then, complete the stitch as usual.
Terms and Abbreviations
Here are the crochet abbreviations used in this pattern. Note that all instructions are written in US terms.
FLO = front loops only
BLO = back loops only
ch = chain(s)
dc = double crochet
FLOdc = front loops only double crochet
hdc = half double crochet
sc = single crochet
sl st = slip stitch
st(s) = stitch(es)
Get the Ad Free Printable Version Here

Christmas Wreath
Create 2, one in white and one in red
Ch51
In the second loop from hook 3sc, 3sc in each stitch (150)
Finish off and leave a tail for sewing
Twist to colours together and sew one end to the other creating a circle, sew the same colours together
Hanging loop
Twist the white and red together and attach to the wreath one spiral apart to create a loop. Hide tails inside spiral.
Holly Pattern
Berries
In red yard, make 3 berries
1. 6sc in a mr (6)
2. (2sc, inc)x2 (8)
3. (2sc, dec) (6)
Sl st. Finish off and close the hole. Leave a tail for sewing on all 3 but leave one tail longer
Sew all 3 berries together in a cluster.
I used one stitch as a guide for each to have the right spacing and pulled them together.
Bring tail out of the same berry at the bottom
Leaves
In spruce green. Make 2.
Ch10
In the second loop from hook sc, sc, hdc, dc, 2dc in the same stitch, dc, hdc, 2sc.
Ch1 and rotate work and work on the bottom of the chain.
2sc, hdc, dc, 2dc in the same stitch, dc, hdc, 2sc
Sl st into the first sc
For the points, do not cut yarn continue working
1. Sc in the next stitch, ch2, in the second loop from the hook sl st, sc into the same stitch on the base.
2. 2sl st
3. Sc, ch2, sl st in second loop, sc in same base stitch
4. 2sl st
5. Sc, ch2, sl st in second loop, sc in same base stitch
6. 2sl st
You should now be at the end of the first side with 3 points.
Create a point on the one end of the leaf and 3 more points on the other side
7. Sc, ch2, sl st in second loop, sc in same base stitch
8. 2sl st
9. Sc, ch2, sl st in second loop, sc in same base stitch
10. 2sl st
11.. Sc, ch2, sl st in second loop, sc in same base stitch
12. 2sl st
13. Sc, ch2, sl st in second loop, sc in same base stitch
14. sl st
You should now have 7 total points and be at the end of the leaf.
Stem for leaves. Do not cut yarn
15. Ch4
16. sl st in second loop from hook, 2sl st, 12sl st through the middle of the leaf.
Once you reach the end, cut a long tail and pull yarn through the chain, weave the tail down to the stem on the back of the leaf.
Assembly
Position berries on top of the leaves and sew on using each of the tails from the berries, hide the lower tail inside the berry, if not attaching to anything hide all tails into berries.
Using the tails of the leaves sew tips of the stems together, weave tails into leaves.
Position on top of wreath and sew into place using the red yarn
Tada!! You have created your Christmas Wreath!

Get the Ad Free Printable Version Here
This pattern is for PERSONAL USE ONLY. The pattern and or parts of it may not be reproduced, translated, altered for sale or for free. You may NOT MASS produce plushies made by this pattern in crochet or inspired by this pattern in other mediums. You may sell your item with this pattern in limited quantities
Please give credit that this pattern was designed by:
Julia Pilling
Facebook page: Julias Stuff and Crochet
Instagram: JuliasstuffnCrochet
Email: juliasstuffncrochet@gmail.com
If you have any questions about my patterns please contact me anytime.
More From us
One response to “How to Make a Christmas Wreath Ornament”
-
[…] For free crochet pattern visit: Christmas Wreath with Holly. […]
Follow us on social media
Instagram: https://www.instagram.com/sugarsweetstreetbakery/
Pinterest: https://www.pinterest.ca/sugarsweetst/
Twitter: https://mobile.twitter.com/street_bakery
Website: https://sugarsweetstreetbakery.ca
Share this:

Related Posts


Leave a Reply