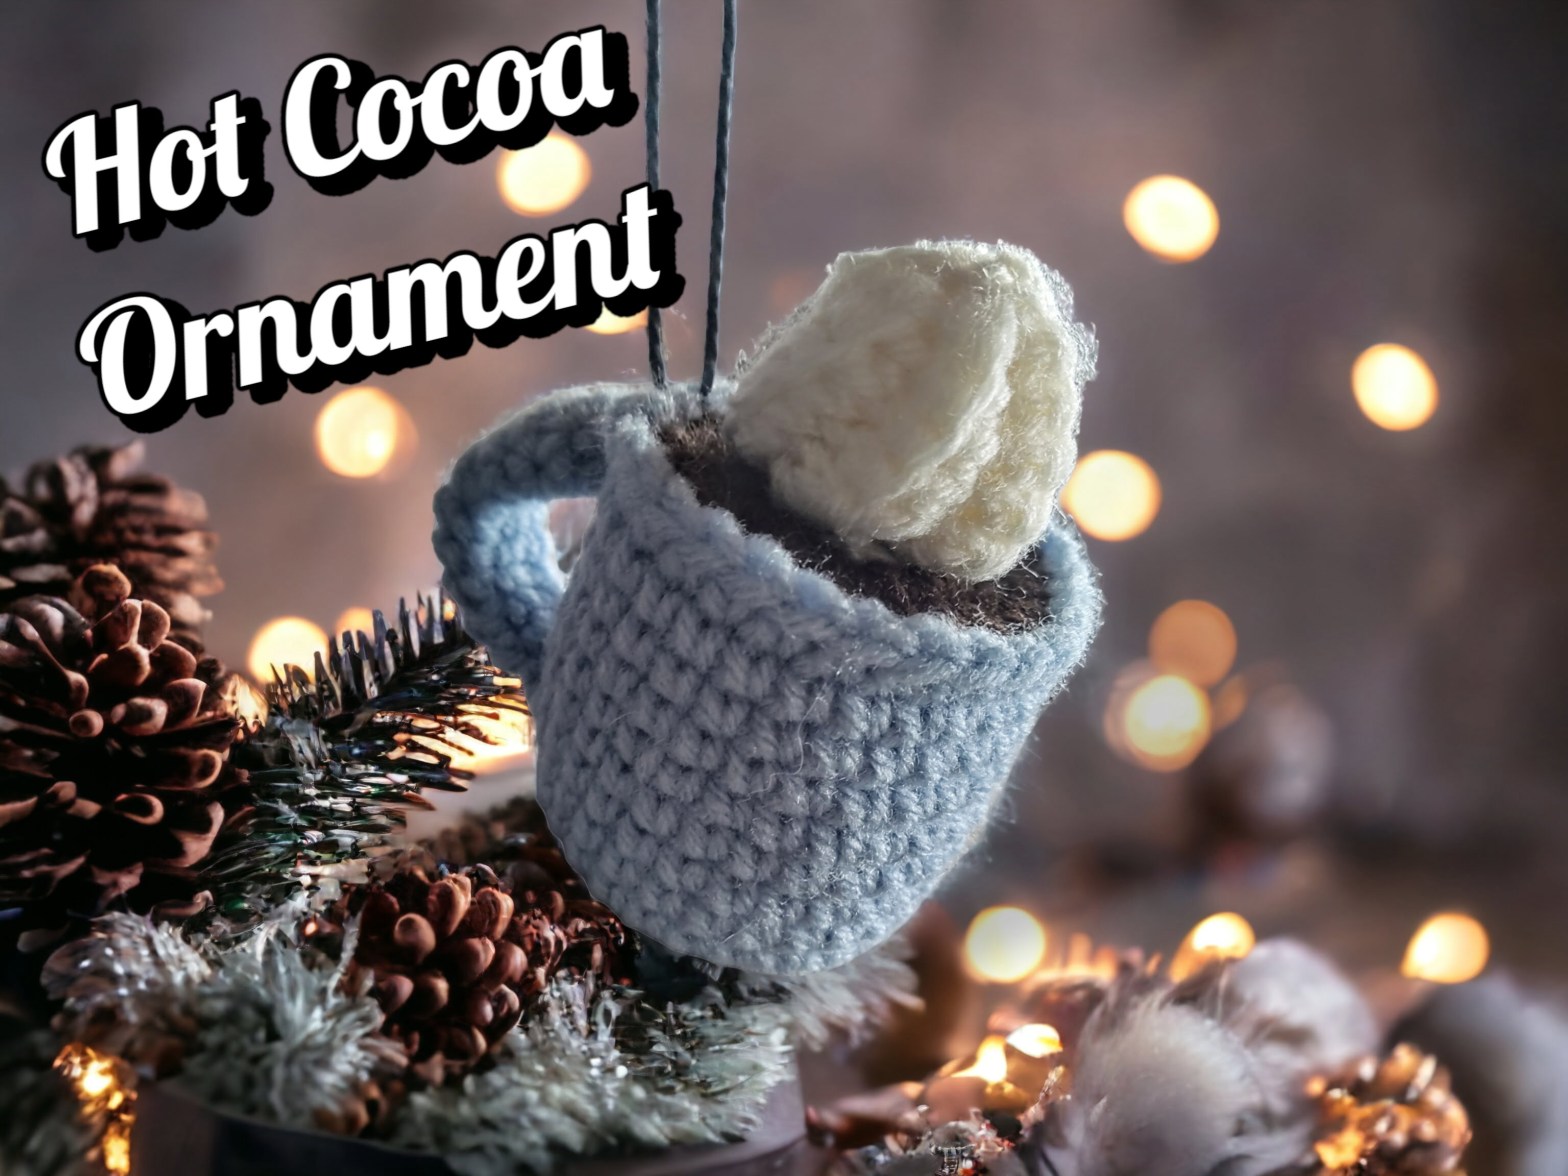
This delightful crocheted hot cocoa ornament is not only simple to make but also makes for a charming addition to your holiday decor.

Get the Ad Free Printable Version Here
To begin, gather your crochet supplies and choose your preferred color for the cup. You have the freedom to get creative and personalize your ornament by adding embroidery or embellishments to the sides of the cup. This allows you to infuse your own unique style and flair into the design.
The pattern for this adorable ornament is incredibly easy to follow, making it an ideal project for crochet enthusiasts of all skill levels. Whether you are a beginner looking to hone your crocheting techniques or an experienced crafter seeking a quick and fun project, this pattern will surely meet your needs.
Not only is this crocheted hot cocoa ornament a delightful addition to your own holiday decorations, but it also makes for a wonderful handmade gift. Imagine the joy it would bring to your friends and family as they unwrap this charming ornament and find it adorning their Christmas tree or hanging by the fireplace.
With its simplicity, versatility, and the joy it brings, this crocheted hot cocoa ornament will quickly become a favorite in your repertoire. So grab your crochet hook, select your favorite yarn, and get ready to craft a whimsical cup of cocoa, complete with a delightful crocheted whipped cream topping. Happy crocheting!
Supplies needed:
Medium worsted yarn
Mainstay Cozy Yarn Macchiato – 4.5 yards
Mainstay Cozy Yarn White – 7.5 yards
Red Heart Comfort Baby Blue – 28 yards
Crochet hook – I used 3.5mm but you can use what you would like. Size will change
Yarn needle
Scissors
Stuffing
Stitch marker
Cardboard
Crochet Techniques to Know
Here are the basic crochet stitches we’ll use in this project.
Slip Stitch (sl st): To make a slip stitch, insert the hook into the stitch, yarn over, and pull through both the stitch and the loop on the hook.
Single Crochet (sc): To make a single crochet, insert the hook into the stitch, yarn over, and pull up a loop (2 loops on the hook). Yarn over again and pull through both loops to complete the stitch.
Half Double Crochet (hdc): This stitch is taller than a single crochet. To make an hdc, yarn over, insert the hook into the stitch, yarn over, and pull up a loop (3 loops on hook). Yarn over again and pull through all 3 loops to complete the stitch.
Working in the Back Loops (blo): Normally, we work through both top loops of a stitch. But in this project, we’ll work in the back loops only to create a ribbed texture. To do this, insert the hook under the back loop only. Then, complete the stitch as usual.
Terms and Abbreviations
Here are the crochet abbreviations used in this pattern. Note that all instructions are written in US terms.
BLO = back loops only
ch = chain(s)
dc = double crochet
FLOdc = front loops only double crochet
hdc = half double crochet
sc = single crochet
sl st = slip stitch
st(s) = stitch(es)
Get the Ad Free Printable Version Here

Get the Ad Free Printable Version Here
Hot Cocoa Ornament Pattern
Cup
In baby blue yarn
1. 7sc in a mr (7)
2. (Inc) (14)
3. (Sc, inc) (21)
4. (2sc, inc) (28)
5. BLO sc around (28)
6.- 13. Sc around for 8 rows (28)
Sl st and finish off.
Handle
In baby blue yarn
Ch6 attach together using a Sl st to create a ring
1.- 11. Sc around for 11 rows.
Sl st and finish off leaving a long tail for sewing
Hot Cocoa
In macchiato or dark brown
1. 7sc in a mr (7)
2. (Inc) (14)
3. (Sc, inc) (21)
4. (2sc, inc)x5, 2 sl st (21)
Finish off and leave a tail for sewing
Whipped Topping
In white yarn
1. Ch11
2. Sc Second loop from the hook, 9sc, ch1 (10)
Work in only back loops for the rest
3. Skip 1 stitch, 9sc , ch2, turn (9)
4. Starting in second loop from the hook 10sc, ch1, turn (10)
5. Skip 1 stitch, 9sc , ch2, turn (9)
6. Starting in second loop from the hook 10sc, ch1, turn (10)
7. Skip 1 stitch, 9sc , ch2, turn (9)
8. Starting in second loop from the hook 10sc, ch1, turn (10)
9. Skip 1 stitch, 9sc , ch2, turn (9)
10. Starting in second loop from the hook 10sc, ch1, turn (10)
11. Skip 1 stitch, 9sc (9)
Finish off and leave a long tail for sewing. Create a tube by sewing the long ends together. Using a running stitch close one end, pull tight, insert needle through the middle and use a running stitch to close the other end, pull tight.
Assembly
Using cardboard cut 2 circles out the same shape of the bottom of the cup. Insert one cardboard into the bottom, stuff and insert the other on the top.
Sew the hot cocoa inside the cup using the back of the stitches.
Pin and attach handle
Pin and attach whipped topping
Get the Ad Free Printable Version Here

Get the Ad Free Printable Version Here
This pattern is for PERSONAL USE ONLY. The pattern and or parts of it may not be reproduced, translated, altered for sale or for free. You may NOT MASS produce plushies made by this pattern in crochet or inspired by this pattern in other mediums. You may sell your item with this pattern in limited quantities
Please give credit that this pattern was designed by:
Julia Pilling
Facebook page: Julias Stuff and Crochet
Instagram: JuliasstuffnCrochet
Email: juliasstuffncrochet@gmail.com
If you have any questions about my patterns please contact me anytime.
More From us
Follow us on social media
Instagram: https://www.instagram.com/sugarsweetstreetbakery/
Pinterest: https://www.pinterest.ca/sugarsweetst/
Twitter: https://mobile.twitter.com/street_bakery
Website: https://sugarsweetstreetbakery.ca
Share this:

Related Posts


Leave a Reply