Your cart is currently empty!
How to Make Christmas Lights
Advertisements
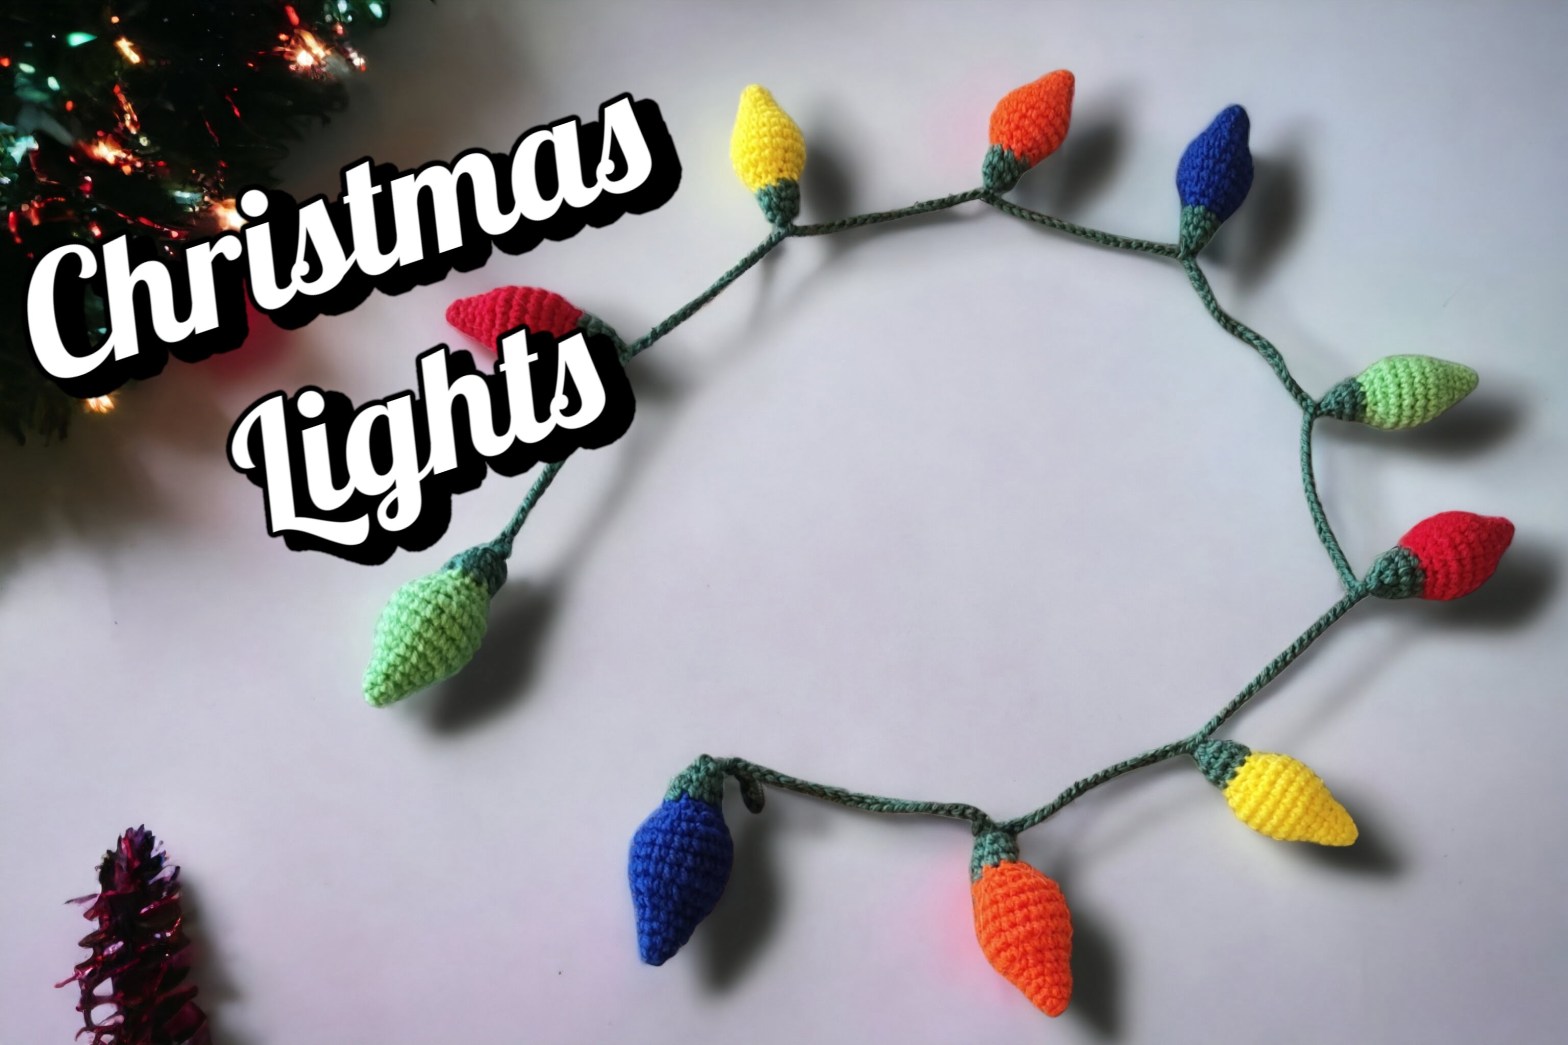
Crocheted Christmas lights garland is a popular choice for holiday decor! It’s not only super cute but also a fun and enjoyable pattern to work on. Creating a crocheted garland adds a personal touch to your Christmas decorations and can bring a cozy and festive atmosphere to your home.
Get the Ad Free Printable Version Here

Get the Ad Free Printable Version Here
Advertisements
When crocheting a Christmas lights garland, you can get creative with your choice of colors. Opt for traditional shades like red, green, and white, or go for a more playful approach with vibrant and colorful lights. They will brighten up any space and spread holiday cheer wherever you display them.
One of the best things about crocheting a Christmas lights garland is that it allows you to customize the length and size according to your preference. You can make a short garland to hang on your mantle or create a longer one to drape along your Christmas tree. The possibilities are endless!
As you work on the pattern, you’ll enjoy the calming rhythm of the crochet stitches and the satisfaction of seeing the lights take shape. It’s a great project to work on during the holiday season, whether you’re cozying up by the fireplace or enjoying a cup of hot cocoa.
Advertisements
Once you’ve finished crocheting your Christmas lights garland, you can embellish it further by adding small crochet or felted ornaments, beads, or sequins to represent the bulbs. This will add an extra touch of sparkle and make your garland truly unique.
So, gather your crochet hook and yarn, and get ready to embark on a delightful journey of making a crocheted Christmas lights garland. With every stitch, you’ll create memories and add a special touch to your holiday decorations that will be cherished for years to come. Happy crocheting!
Advertisements
Supplies needed:
Medium worsted yarn –
Mainstay Cozy Yarn Spruce – 30 yards
Mainstay Cozy Yarn Poppy – 21 yards
Mainstay Cozy Yarn Blue V – 21 yards
Advertisements
Bernat Premium Yarn Yellow Balloon – 21 yards
Bernat Premium Yarn Orange – 21 yards
Red Heart Comfort Yarn Melon Green – 21 yards
Crochet hook – I used 3.5mm but you can use what you would like. Size will change
Advertisements
Yarn needle
Scissors
Stuffing
Stitch marker
Advertisements
Crochet Techniques to Know
Here are the basic crochet stitches we’ll use in this project.
Slip Stitch (sl st): To make a slip stitch, insert the hook into the stitch, yarn over, and pull through both the stitch and the loop on the hook.
Single Crochet (sc): To make a single crochet, insert the hook into the stitch, yarn over, and pull up a loop (2 loops on the hook). Yarn over again and pull through both loops to complete the stitch.
Advertisements
Half Double Crochet (hdc): This stitch is taller than a single crochet. To make an hdc, yarn over, insert the hook into the stitch, yarn over, and pull up a loop (3 loops on hook). Yarn over again and pull through all 3 loops to complete the stitch.
Working in the Back Loops (blo): Normally, we work through both top loops of a stitch. But in this project, we’ll work in the back loops only to create a ribbed texture. To do this, insert the hook under the back loop only. Then, complete the stitch as usual.
Advertisements
Terms and Abbreviations
Here are the crochet abbreviations used in this pattern. Note that all instructions are written in US terms.
BLO = back loops only
ch = chain(s)
dc = double crochet
FLOdc = front loops only double crochet
Advertisements
hdc = half double crochet
sc = single crochet
sl st = slip stitch
st(s) = stitch(es)
Advertisements
Get the Ad Free Printable Version Here

Get the Ad Free Printable Version Here
Light Bulb Pattern
Make 2 of each colour, red, green, blue, orange and yellow. Stuff as you go.
Starting in the coloured yarn
1. 3sc in a mr (3)
Advertisements
2. (Inc)x3 (6)
3. (sc, inc)x3 (9)
4. Sc around (9)
5. (2sc, inc)x3 (12)
Advertisements
6. (sc, inc)x6 (18)
7.- 10. Sc around for 4 rows (18)
11. (sc, dec) (12)
12. (2sc, dec) (9)
Advertisements
Switch to spruce green
13.- 14. Sc around for 2 rows (9)
15. (sc, dec) (6)
Finish off. Close hole.
Advertisements
Repeat until you have 2 of each colour or until you have made the amount you want.
Wire
Using the spruce green
String all of the light bulbs you made on the yarn. I put them in the order of blue, orange, yellow, red then green and repeated it.
Advertisements
1. Ch5, bring first bulb to the hook and ch over the first bulb
2. Ch20, bring the next bulb up and ch over bulb
Repeat 2 until the last bulb.
3. Ch4
Advertisements
Finish off and weave ends into the chain.

Get the Ad Free Printable Version Here
Advertisements
WOOO!! You are finished your Christmas lights!
This pattern is for PERSONAL USE ONLY. The pattern and or parts of it may not be reproduced, translated, altered for sale or for free. You may NOT MASS produce plushies made by this pattern in crochet or inspired by this pattern in other mediums. You may sell your item with this pattern in limited quantities
Please give credit that this pattern was designed by:
Julia Pilling
Facebook page: Julias Stuff and Crochet
Instagram: JuliasstuffnCrochet
Email: juliasstuffncrochet@gmail.com
If you have any questions about my patterns please contact me anytime.
Advertisements
More From us
Advertisements
2 responses to “How to Make Christmas Lights”
-
My granddaughter & her friends are having so much fun with your patterns! You have patterns for all skill level! I taught them to crochet with kits that have video tutorials from a well known company with beginner kits. Several girls prefer to use these kits, but the majority love to find patterns on pintrest.
-
I love this. Thank you for sharing. I have so many patterns that I am working on and going to post. Hopefully they love them.
-
Advertisements
Follow us on social media
Instagram: https://www.instagram.com/sugarsweetstreetbakery/
Pinterest: https://www.pinterest.ca/sugarsweetst/
Twitter: https://mobile.twitter.com/street_bakery
Website: https://sugarsweetstreetbakery.ca
Share this:

Related Posts

Crafting a no-sew heart octopus is an incredibly delightful activity...

The adorable and quirky world of nerdy crochet patterns has...

Ned Flanders is a beloved character from the iconic animated...


Dumplin the elephant is indeed a delightful sight to behold....

Peanut the elephant is the cutest creature you will ever...
by
Comments
2 responses to “How to Make Christmas Lights”
-
My granddaughter & her friends are having so much fun with your patterns! You have patterns for all skill level! I taught them to crochet with kits that have video tutorials from a well known company with beginner kits. Several girls prefer to use these kits, but the majority love to find patterns on pintrest.
-
I love this. Thank you for sharing. I have so many patterns that I am working on and going to post. Hopefully they love them.
-
Leave a Reply