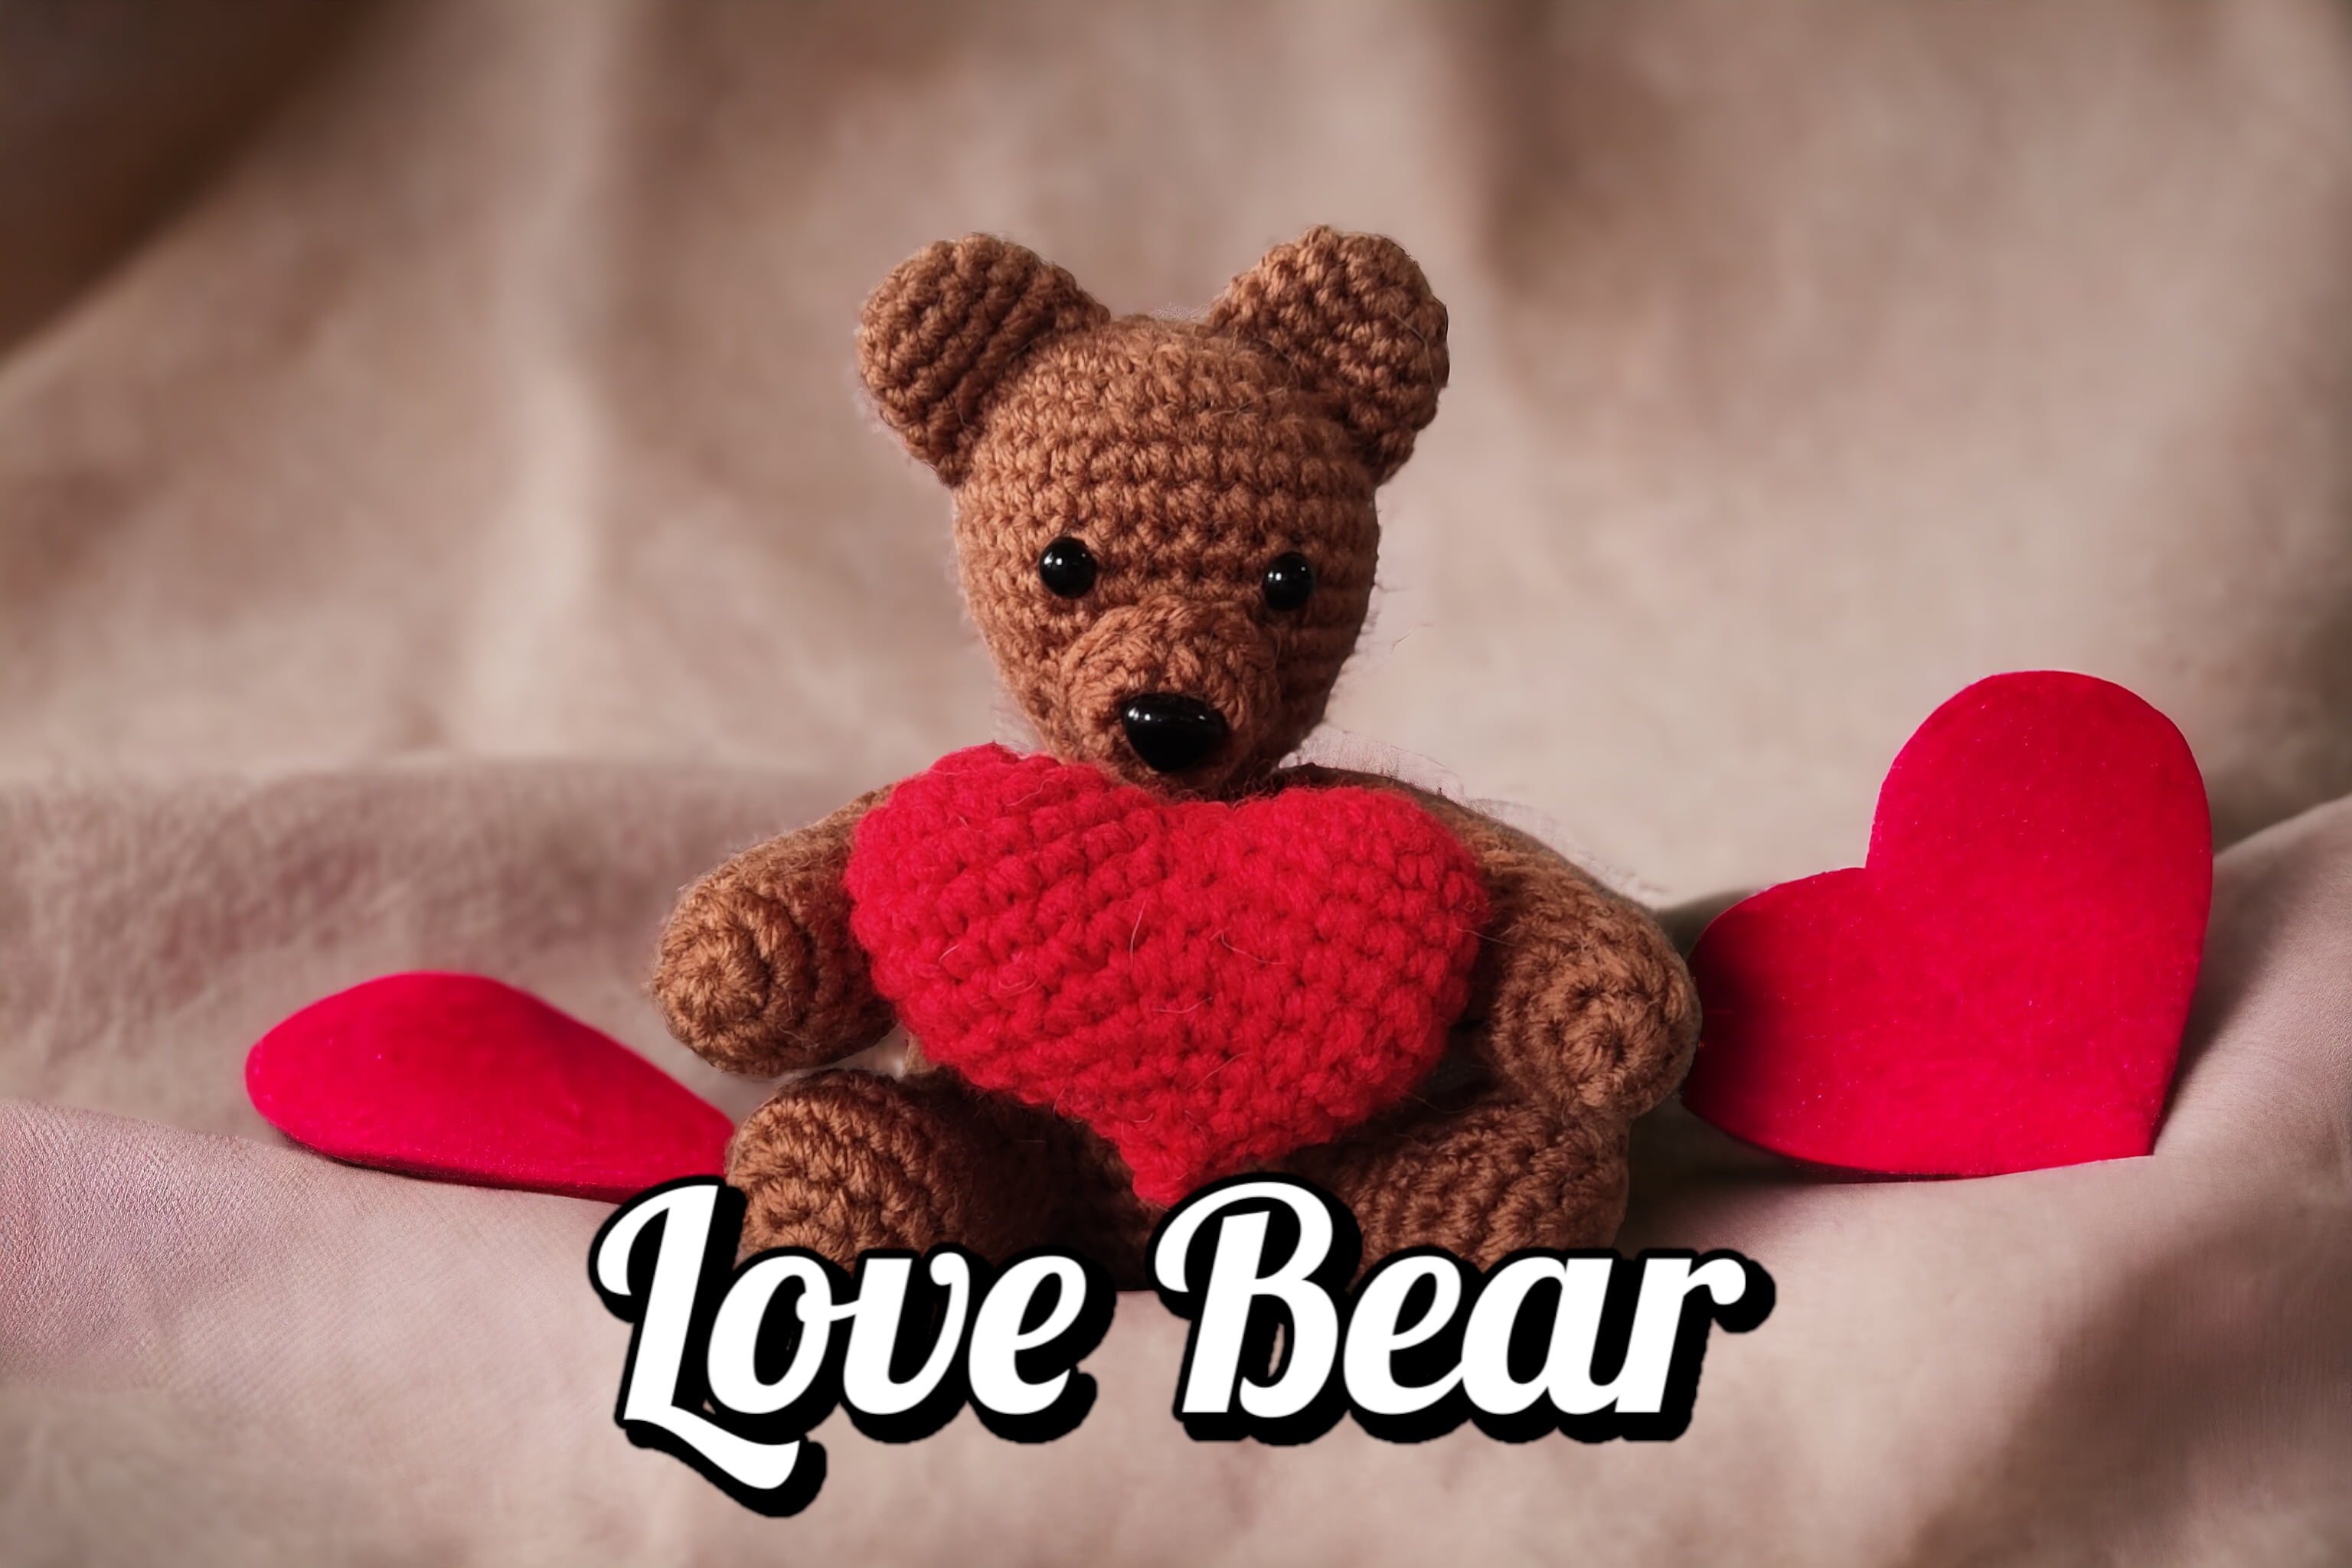
The crocheted love bear holding a heart is truly the epitome of cuteness and charm! Its endearing presence is a testament to the love and care poured into crafting it, evident in every detail. The heart nestled in the bear’s arms adds a sentimental touch, symbolizing love and adoration in the most perfect way.
Get the Ad Free Printable Version Here


Get the Ad Free Printable Version Here
Keep reading for the Free Version
This delightful creation is not only a treat for crochet enthusiasts but also an ideal project for those new to the craft. The pattern is designed to be incredibly user-friendly, ensuring that anyone can take pleasure in creating this adorable bear.
What’s more, the potential for customization knows no bounds! From altering the color scheme to tweaking the heart design, there are countless opportunities to infuse your own personality into this lovable bear. This adaptability allows you to tailor the bear for specific occasions or to match your preferences, making it an excellent choice for adding a personalized touch to gifts or decorations, be it for Valentine’s Day or any celebration centered around love and sweetness.
Embrace the joy of crafting by bringing this endearing love bear to life, whether it’s for yourself or a special someone!
Love Bear Pattern
Gauge
Using single crochet
3.5 mm hook
16 stitches by 18 rows = 4 inch square.
Supplies needed:
Medium worsted yarn
Mainstay Cozy Yarn Poppy – 22 yards
Mainstay Cozy Yarn Caramel – 105 yards
Crochet hook – I used 3.5mm but you can use what you would like. Size will change
Yarn needle
Scissors
Stuffing
Stitch marker
Crochet Techniques to Know
Here are the basic crochet stitches we’ll use in this project.
Slip Stitch (sl st): To make a slip stitch, insert the hook into the stitch, yarn over, and pull through both the stitch and the loop on the hook.
Single Crochet (sc): To make a single crochet, insert the hook into the stitch, yarn over, and pull up a loop (2 loops on the hook). Yarn over again and pull through both loops to complete the stitch.
Half Double Crochet (hdc): This stitch is taller than a single crochet. To make an hdc, yarn over, insert the hook into the stitch, yarn over, and pull up a loop (3 loops on hook). Yarn over again and pull through all 3 loops to complete the stitch.
Working in the Back Loops (blo): Normally, we work through both top loops of a stitch. But in this project, we’ll work in the back loops only to create a ribbed texture. To do this, insert the hook under the back loop only. Then, complete the stitch as usual.
Terms and Abbreviations
Here are the crochet abbreviations used in this pattern. Note that all instructions are written in US terms.
FLO = front loops only
BLO = back loops only
ch = chain(s)
dc = double crochet
FLOdc = front loops only double crochet
hdc = half double crochet
sc = single crochet
sl st = slip stitch
st(s) = stitch(es)

Get the Ad Free Printable Version Here

Love Bear Pattern
Place eyes between rounds 9-10 with 4 stitches apart.
Head and body
Start in brown
1. 6sc in mr (6)
2. (Inc) (12)
3. (Sc, inc) (18)
4. (2sc, inc) (24)
5. Sc around (24)
6. (3sc, inc) (30)
7.- 11. Sc around for 5 rounds (30)
12. (3sc, dec) (24)
13. Sc around (24)
14. (2sc, dec) (18)
15. (Sc, dec) (12) … insert eyes and stuff the head
16. Sc around (12)
17. (Sc, inc) (18)
18. Sc around (18)
19. (2sc, inc) (24)
20. Sc around (24)
21. (3sc, inc) (30)
22. Sc around (30)
23. (4sc, inc) (36)
24.- 27. Sc around for 4 rounds (36)
28. (4sc, dec) (30)
29. (3sc, dec) (24)
30. (2sc, dec) (18)
31. (Sc, dec) (12) … stuff
32. (dec) (6)
Ears
Same colour as the body. Create 2.
1. 6sc in mr (6)
2. (Inc) (12)
3.- 6. Sc around for 4 rounds (12)
Finish off and leave a tail for sewing. Pin and sew into place.
Muzzle
Same colour as body, lightly stuff
1. 6sc in mr (6)
2. (Inc) (12)
3. Sc around (12)
Finish off and leave a tail for sewing. Attach safety nose in the centre of the magic ring. Pin and sew into place.
Arms
Same colour as the body. Create 2.
1. 6sc in mr (6)
2. (Inc) (12)
3.- 15. Sc around for 13 rounds (12) .. stuff leaving a space at the top. Fold both sides together
16. 5sc through both sides
Finish off leaving a tail for sewing. Pin and sew into place.
Legs
Same colour as the body. Create 2.
1. 6sc in mr (6)
2. (Inc) (12)
3. (Sc, inc) (18)
4.- 5. Sc around for 2 rounds (18)
6. 5sc, 4dec, 5sc (14)
7. 5sc, 2dec, 5sc (12)
8.- 9. Sc around for 2 rounds (12)
Left leg
10. Sc, 4sl st, 7sc (12)
Finish off leaving a tail for sewing
Right leg
10. 7sc, 4sl st, sc (12)
Finish off leaving a tail for sewing. Pin and sew legs in place
Heart
In red
First hump
1. 6sc in mr (6)
2. (Inc) (12)
3. (Sc, inc) (18)
4. Sc around (18)
Finish off leave a tail for sewing
Second hump
1. 6sc in mr (6)
2. (Inc) (12)
3. (Sc, inc) (18)
4. Sc around (18)
5. 18sc, attach the first hump using a sc, 17sc, sc on the second hump (36) move stitch marker.
6. (8sc, inc) x4 (40)
7. (8sc, dec) (36)
8. (4sc, dec) x6 (30) … sew the hole closed between the humps.
9. (3sc, dec) (24)
10. (2sc, dec) (18)
11. (Sc, dec) (12) .. stuff
12. (Dec) (6)
13. 2dec (4)
Finish off and close the hole.
Sew the heart into the bear’s hands.
Tada! You have finished your adorable love bear.

This pattern is for PERSONAL USE ONLY. The pattern and or parts of it may not be reproduced, translated, altered for sale or for free. You may NOT MASS produce plushies made by this pattern in crochet or inspired by this pattern in other mediums. You may sell your item with this pattern in limited quantities
Please give credit that this pattern was designed by:
Julia Pilling
Facebook page: Julias Stuff and Crochet
Instagram: JuliasstuffnCrochet
Email: juliasstuffncrochet@gmail.com
Join our facebook group Christmas Crochet and Amigurumi Patterns
If you have any questions about my patterns please contact me anytime.
More From us
Follow us on social media
Instagram: https://www.instagram.com/sugarsweetstreetbakery/
Pinterest: https://www.pinterest.ca/sugarsweetst/
Twitter: https://mobile.twitter.com/street_bakery
Website: https://sugarsweetstreetbakery.ca
Share this:

Related Posts


Leave a Reply