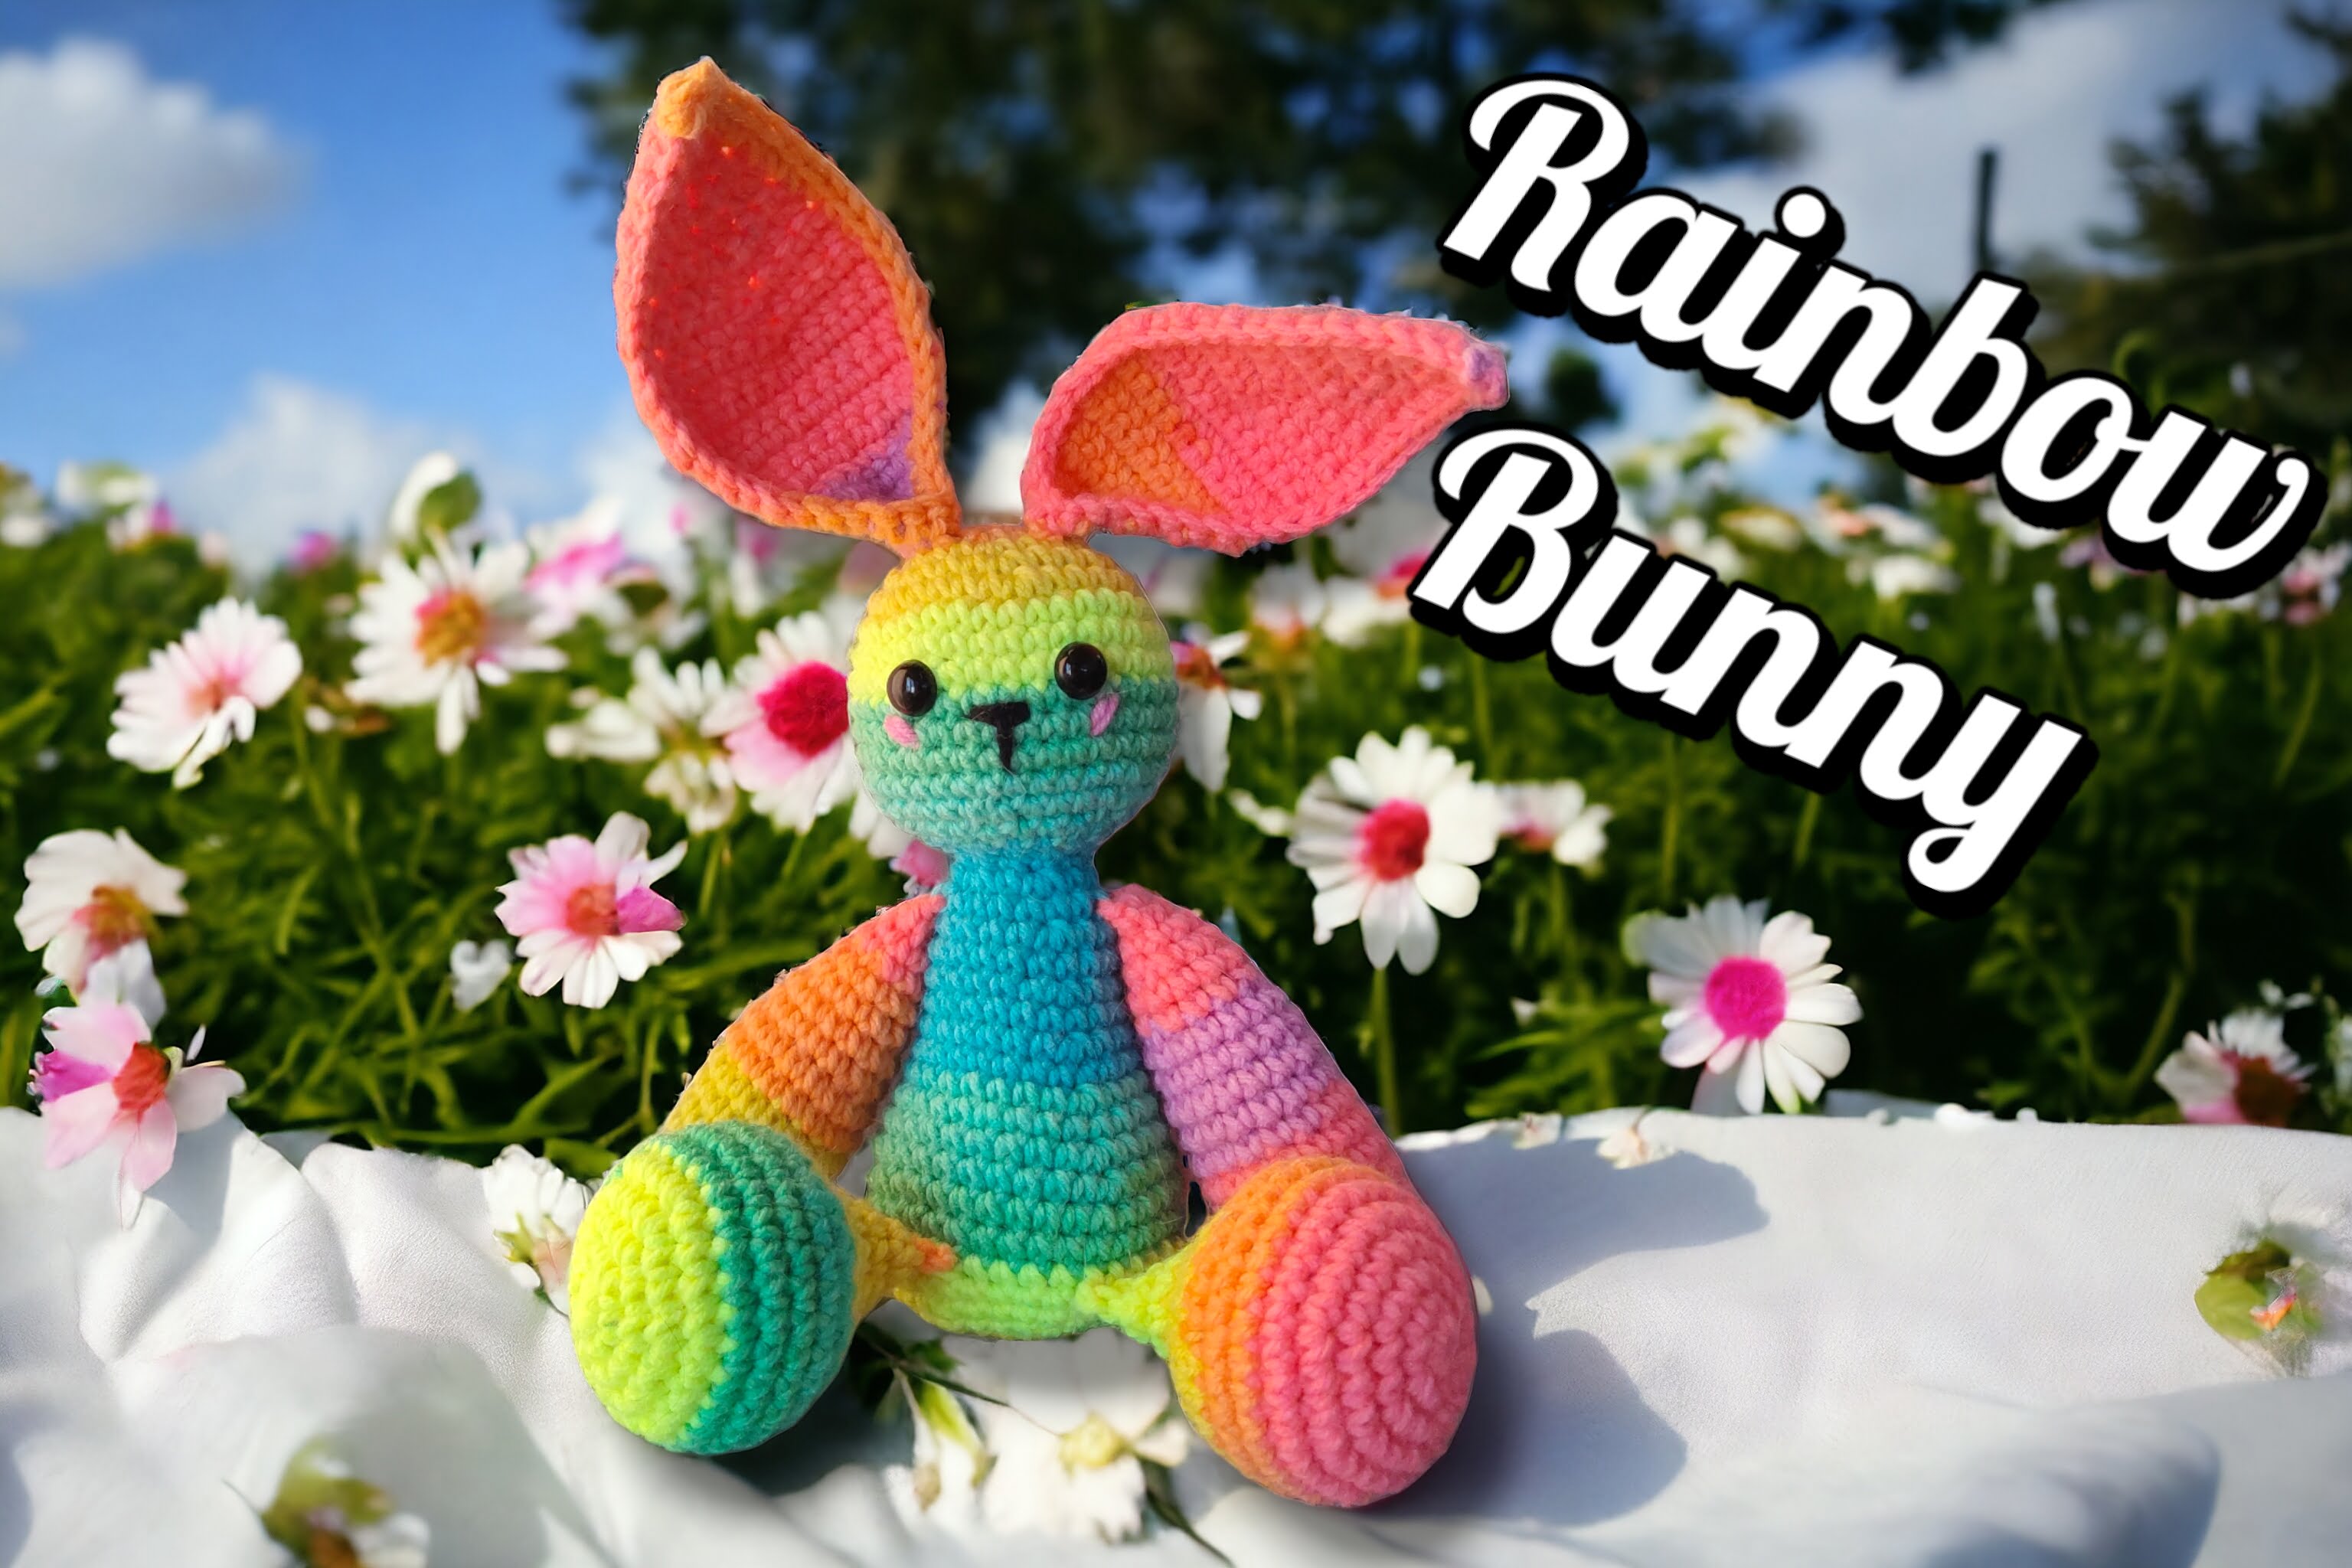
The rainbow bunny crochet pattern is not just a pattern; it’s a gateway to endless creativity and joy. Picture the scene: a cozy crafting corner, colorful skeins of yarn, and the anticipation of bringing to life a charming and cuddly bunny that’s as vibrant as a rainbow. As your crochet hook weaves through the yarn, a magical transformation takes place, and before you know it, a delightful rainbow bunny comes to life, full of personality and ready to spread happiness.
This pattern is a delightful choice for various occasions, from Easter celebrations to heartwarming baby showers. The rainbow bunny, with its cheerful colors and adorable design, is not just a toy; it’s a symbol of love and creativity, perfect for sparking joy in anyone who crosses its path. The detailed instructions ensure that both beginners and seasoned crocheters can embark on this enchanting project with confidence, and the result is a whimsical creation that captures the essence of childhood wonder.

Get the Ad Free Printable Version Here
Keep reading for the Free Version

What’s more, the rainbow bunny pattern invites personalization and imagination. You can infuse your unique style into this project, whether it’s by selecting a custom color palette, adding charming embellishments, or even crafting a personalized name tag for your bunny. The process of making this lovable creation is an experience in itself, filled with joy and the satisfaction of seeing each piece come together to form a work of art.
The charm of the rainbow bunny extends beyond the act of creation; it holds the power to bring joy to others. Imagine the delight on a child’s face upon receiving their very own handmade rainbow bunny, or the warmth in a friend’s heart as they unwrap this thoughtful, one-of-a-kind gift. The rainbow bunny is not just a crochet project; it’s a source of boundless delight and a tangible expression of care and creativity that transcends language and age.
So, whether you’re an experienced crocheter seeking a delightful project to brighten your day or a newcomer to the world of crochet eager to embark on a heartwarming journey, the rainbow bunny crochet pattern beckons. It’s an invitation to unleash your creativity, spread happiness, and create a timeless masterpiece that will surely bring smiles to many faces. With your hooks and yarn at the ready, it’s time to embark on the enchanting journey of bringing your very own rainbow bunny to life.
Rainbow Bunny Pattern
Gauge
Using single crochet
3.5 mm hook
16 stitches by 18 rows = 4 inch square.
Supplies needed:
Medium worsted yarn
Mainstay Acrylic Retro Stripe – 162 yards
Crochet hook – I used 3.5mm but you can use what you would like. Size will change
Yarn needle
Scissors
Stuffing
Stitch marker
Crochet Techniques to Know
Here are the basic crochet stitches we’ll use in this project.
Slip Stitch (sl st): To make a slip stitch, insert the hook into the stitch, yarn over, and pull through both the stitch and the loop on the hook.
Single Crochet (sc): To make a single crochet, insert the hook into the stitch, yarn over, and pull up a loop (2 loops on the hook). Yarn over again and pull through both loops to complete the stitch.
Half Double Crochet (hdc): This stitch is taller than a single crochet. To make an hdc, yarn over, insert the hook into the stitch, yarn over, and pull up a loop (3 loops on hook). Yarn over again and pull through all 3 loops to complete the stitch.
Working in the Back Loops (blo): Normally, we work through both top loops of a stitch. But in this project, we’ll work in the back loops only to create a ribbed texture. To do this, insert the hook under the back loop only. Then, complete the stitch as usual.
Terms and Abbreviations
Here are the crochet abbreviations used in this pattern. Note that all instructions are written in US terms.
FLO = front loops only
BLO = back loops only
ch = chain(s)
dc = double crochet
FLOdc = front loops only double crochet
hdc = half double crochet
sc = single crochet
sl st = slip stitch
st(s) = stitch(es)
Get the Ad Free Printable Version Here


Rainbow Bunny Pattern
In rainbow yarn for all steps.
Arms
Make 2
1. 6sc in mr (6)
2. (Inc) (12)
3. (Sc, inc) (18)
4.- 11. Sc around for 8 rounds (18)
12. (4sc, dec)x3 (15)
13. Sc around (15)
14. (3sc, dec) (12)
15. Sc around (12)
16. (2sc, dec) (9)
17. Sc around (9) … stuff
18. (Sc, dec) (6)
19. Fold in half, 3sc through both sides (3)
Finish off and weave the tail in
Legs
Make 2
1. 6sc in mr (6)
2. (Inc) (12)
3. (Sc, inc) (18)
4. (2sc, inc) (24)
5. (3sc, inc) (30)
6.- 9. Sc around for 4 rounds (30)
10. (3sc, dec) (24)
11. (2sc, dec) (18)
12. (Sc, dec) (12)
13.- 15. Sc around for 3 rounds (12) … stuff
16. Fold in half, 6sc through both sides (6)
Finish off and weave the tail in.
Ears
Make 2
1. Ch7, 6sc starting in the second loop, ch1, turn (6)
2.- 3. 6sc, ch1, turn (6)
4. Inc, 4sc, inc, ch1, turn (8)
5. 8sc, ch1, turn (8)
6. Inc, 6sc, inc, ch1, turn (10)
7.- 8. 10sc, ch1, turn (10)
9. Inc, 8sc, inc, ch1, turn (12)
10.- 11. 12sc, ch1, turn (12)
12. 5sc, skip 2 stitches, 5sc, ch1, turn (10)
13. 10sc, ch1, turn (10)
14. 4sc, skip 2 stitches, 4sc, ch1, turn (8)
15. 8sc, ch1, turn (8)
16. 3sc, 2tog, 3sc, ch1, turn (7)
17. 2sc, 2tog, 3sc, ch1, turn (6)
18. 2sc, 2tog, 2sc, ch1, turn (5)
19. 2sc, 2tog, sc, ch1, turn (4)
20. Sc, 2tog, sc, ch1, turn (3)
21. 2tog, sc, ch1, turn (2)
22. 2tog, ch1, turn (1)
23. Sc (1)
24. 22sc down left side, fold and sc to other corner, 22sc on right side, ch2, sl st into first stitch to end the round (45)
Head and Body
Starting at the head
1. 6sc in mr (6)
2. (Inc) (12)
3. Sc, inc, *sc, inc, sc* over ear, inc, sc, *inc, sc, inc* over second ear, sc, inc (18)
4. (2sc, inc) (24)
5. (3sc, inc) (30)
6. (4sc, inc) (36)
7.- 13. Sc around for 7 rounds (36)
14. (4sc, dec) (30)
15. (3sc, dec) (24)
16. (2sc, dec) (18)
17. (Sc, dec) (12) … stuff
18. Sc around (12)
20. (Sc, inc) (18)
21. 4sc, 3sc over arm, 6sc, 3sc over second arm, 2sc (18)
22. (5sc, inc)x3 (21)
23. Sc around (21)
24. (6sc, inc) (24)
25. Sc around (24)
26. (7sc, inc) (27)
27. Sc around (27)
28. (8sc, inc) (30)
29. Sc around (30)
30. (9sc, inc) (33)
31. (10sc, inc) (36)
32.- 33. Sc around for 2 rounds (36)
34. 12sc, 6sc over foot, 4sc, 6sc over second foot, 8sc (36)
35. Sc around (36)
36. (4sc, dec) (30)
37. (3sc, dec) (24)
38. (2sc, dec) (18)
39. (Sc, dec) (12) … stuff
40. (Dec) (6)
Finish off and close the hole.
Add embroidery for the nose and a pompom for the tail
Woooohhoooo! Tada! You are finished with your Rainbow Bunny!!


This pattern is for PERSONAL USE ONLY. The pattern and or parts of it may not be reproduced, translated, altered for sale or for free. You may NOT MASS produce plushies made by this pattern in crochet or inspired by this pattern in other mediums. You may sell your item with this pattern in limited quantities
Please give credit that this pattern was designed by:
Julia Pilling
Facebook page: Stuff N’ Crochet
https://www.facebook.com/groups/573286828347511/?ref=share_group_link
Instagram: JuliasstuffnCrochet
Email: juliasstuffncrochet@gmail.com
Join our facebook group Christmas Crochet and Amigurumi Patterns
If you have any questions about my patterns please contact me anytime.
More From us
Follow us on social media
Instagram: https://www.instagram.com/sugarsweetstreetbakery/
Pinterest: https://www.pinterest.ca/sugarsweetst/
Twitter: https://mobile.twitter.com/street_bakery
Website: https://sugarsweetstreetbakery.ca
Share this:

Related Posts


Leave a Reply